
The Physics of Heat on Meat
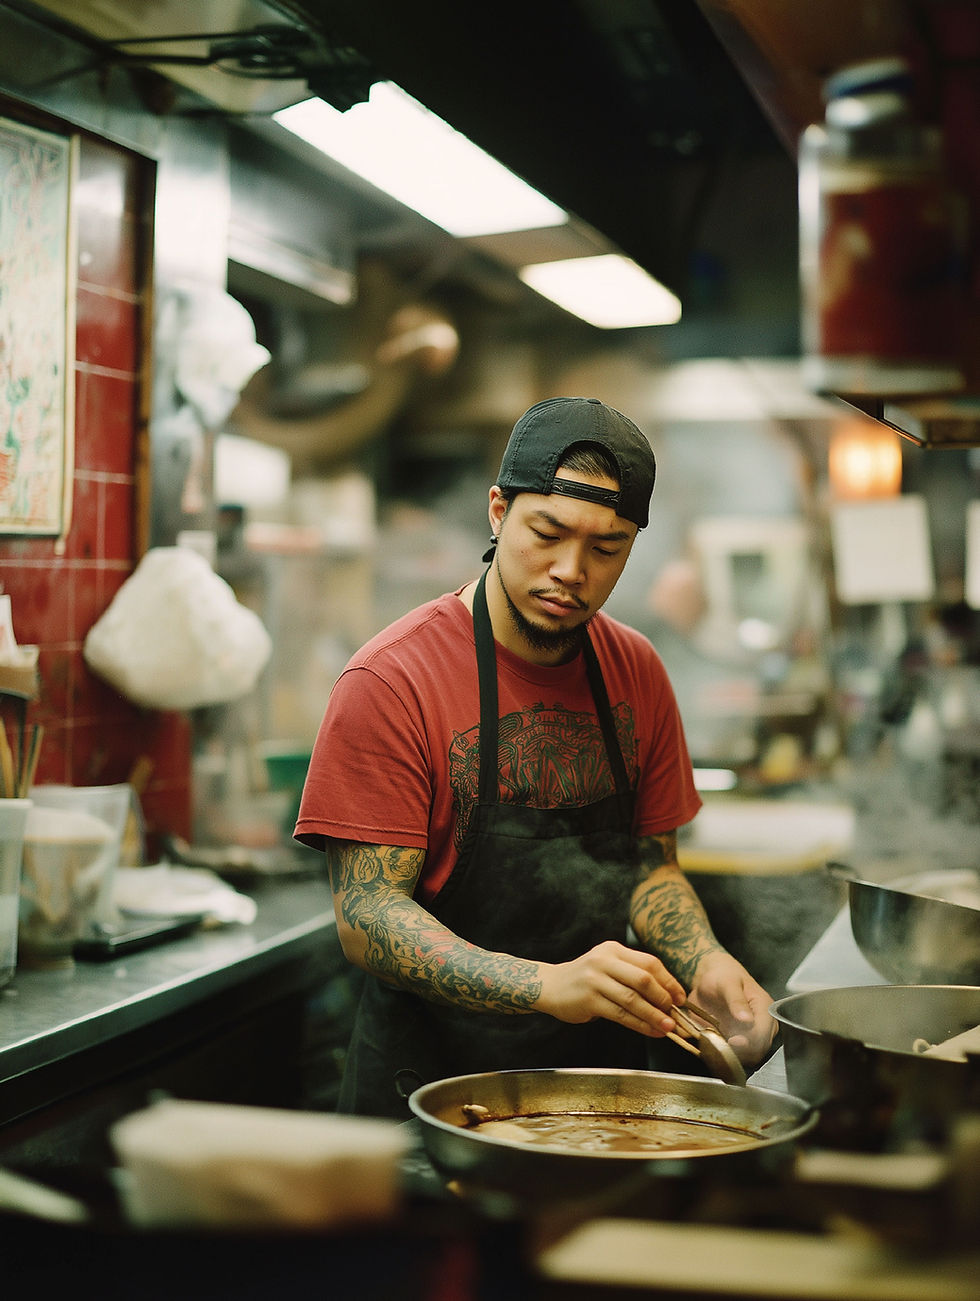
Understanding what actually happens when you apply heat to muscle tissue—and why it matters for your cooking technique.
The Anatomy of Meat
Before we can understand how heat transforms meat, we need to know what meat is made of. This isn't just academic curiosity—it's the foundation of every cooking decision you make.
Meat is about 75% water, 20% protein, and 5% fat. But that simple breakdown doesn't tell the whole story. The arrangement of these components is critical to how meat behaves when you apply heat.
Muscle Fibers: These are the long, cylindrical cells that make up the bulk of meat. They contain the proteins actin and myosin, which are responsible for muscle contraction. The structure of these fibers determines how tender the meat is. As an animal ages and exercises, these fibers thicken and strengthen. That's why a mature steer produces tougher meat than a young calf.
Myoglobin and Color: The red color of meat comes from myoglobin, a protein that stores oxygen in muscle tissue. It contains an iron atom that binds with oxygen, giving meat its characteristic red hue. Darker muscles—like those in the leg of a chicken—have more myoglobin than lighter muscles like the breast. The more myoglobin present, the darker and more strongly flavored the meat.
Connective Tissue: This is the scaffolding that holds muscle fibers together. It's made primarily of collagen and elastin. Collagen is the key player in meat texture—it's tough and chewy when raw, but breaks down into gelatin when cooked properly. Elastin, on the other hand, never softens. It's the reason some cuts remain tough no matter how long you cook them. The best strategy with elastin is to remove it before cooking.
Fat: Fat isn't just flavor—it's moisture insurance. Intramuscular fat (marbling) melts during cooking, coating the muscle fibers and giving meat a sense of juiciness even if moisture levels are relatively low. Fat also carries flavor compounds that are hydrophobic (water‑hating), which means they dissolve in fat and are released only when the fat melts.
The Chemistry of Protein Transformation
Proteins are long chains of amino acids folded into specific three‑dimensional structures. When you apply heat, those structures break down—a process called denaturation.
The Native State: In their natural state, proteins are folded into complex shapes that minimize their energy. Hydrophobic amino acids hide inside the protein structure, while hydrophilic amino acids stay on the surface where they can interact with water.
Denaturation: When you apply heat—or acid, or salt, or mechanical force—the weak bonds holding the protein structure together break. The protein unfolds, exposing its hydrophobic core to the surrounding environment. This is the first step in cooking meat.
Coagulation: Once proteins are denatured, they can bond with each other. Disulfide bridges form between cysteine residues. Hydrophobic regions attract each other. Electrostatic forces pull charged regions together. The result is a network of proteins that traps water molecules, creating a gel.
Syneresis: As the gel strengthens, it squeezes water out. This is what happens when you overcook meat—the protein network contracts so tightly that it expels the water it was holding, leaving the meat dry and tough.
The Temperature Timeline
Different proteins denature at different temperatures, which gives us a roadmap for cooking meat.
35–40°C: The highly heat‑sensitive myosin proteins begin to denature. This is when meat starts to lose its translucency and the first juices begin to appear.
40–50°C: Sarcoplasmic proteins (the proteins in muscle fluid) begin to coagulate. The meat becomes firmer and starts to release more liquid. This is the beginning of the "rare" temperature range.
50–60°C: This is the sweet spot for tenderness. Myoglobin begins to denature, which is why meat loses its red color and turns brown at the higher end of this range. The protein network is still relatively loose, so moisture retention is good. This is the "medium‑rare to medium" range.
60–65°C: Collagen begins to shrink and squeeze out water. The protein network tightens significantly. This is where you start to notice a real difference in texture—meat becomes firmer and noticeably less juicy. This is the "medium‑well" range.
65°C and above: The protein network contracts aggressively, expelling large amounts of water. Meat becomes dry, tough, and chewy. This is the "well‑done" range.
The Chef's Takeaway: The perfect temperature for tenderness is around 55–60°C. The perfect temperature for bacterial safety is above 63°C for extended periods (pasturization). These two needs are in tension—which is why understanding time‑temperature relationships is so important.
Water‑Holding Capacity and Moisture Loss
Water‑holding capacity (WHC) is one of the most important concepts in meat cooking. It determines how much moisture your meat retains after cooking, which is directly related to perceived juiciness.
Raw Meat: In raw meat, about 80% of the water is held within the muscle fibers, between the thick (myosin) and thin (actin) filaments. This is called "bound water" because it's trapped within the structure of the muscle.
Heating to 40–60°C: As the muscle fibers contract transversely, the space between the filaments increases. This means more water can be held. WHC actually increases slightly during this phase, which is why a rare steak can feel so juicy despite losing some moisture.
Heating above 60–65°C: This is where WHC takes a nosedive. The longitudinal contraction of the fibers squeezes water out like a sponge. The protein network tightens, and water is expelled—not just from the surface of the meat, but from the interior as well.
The Yield Curve: Studies have shown that meat cooked to 55°C will lose about 12–15% of its weight. At 65°C, it loses 20–25%. At 75°C, losses can exceed 30%. That's moisture that you're paying for, cooking away, and serving as a puddle on the plate.
Collagen: The Key to Tenderness
Collagen is the protein that gives meat its structure. It's found in tendons, ligaments, and the sheaths that surround muscle fibers. When raw, collagen is tough and chewy—it's what makes a poorly cooked pot roast a disaster.
The Breakdown Process: Collagen is a triple helix structure—three long chains of amino acids twisted around each other. When you apply heat above 55°C, the helix begins to unwind. Above 70°C, the individual chains separate completely, dissolving into the surrounding liquid as gelatin.
Time and Temperature: The breakdown of collagen is both time‑ and temperature‑dependent. At 55°C, it takes many hours for collagen to break down completely. At 70°C, it happens much faster. This is why a sous‑vide short rib at 55°C for 48 hours is succulent and tender, while a slow‑cooker pot roast at 85°C for 8 hours is also tender but much drier.
The Collagen Balance: Cuts that come from heavily exercised muscles—shoulder, leg, neck—have high collagen content. These cuts benefit from long, slow cooking. Cuts that come from less‑exercised muscles—tenderloin, ribeye—have low collagen content. These cuts are best cooked quickly to a lower internal temperature.
The Chef's Takeaway: Tougher cuts demand longer cooking times to break down collagen. But if you want to keep them juicy, you need to cook them at relatively low temperatures—sous‑vide range. This is why braising at a simmer works so well: the liquid environment keeps the meat moist while the collagen breaks down over several hours.
Muscle Fiber Contraction and Shrinkage
When you cook meat, the muscle fibers contract. This is the same process that happens during life, when the animal's nervous system signals the muscles to move—except now, heat is triggering the contraction instead of electrical signals.
Transverse Contraction (40–60°C): The muscle fibers shrink in diameter. This actually increases the space between fibers, creating a more open structure that holds more moisture. This is one reason why meat cooked to medium‑rare feels so tender—the fibers have contracted slightly and become more flexible.
Longitudinal Contraction (60°C and above): The fibers shrink in length. This squeezes water out of the structure as the fibers compress along their long axis. This contraction is the main driver of moisture loss at higher temperatures.
Shrinkage and Yield: A piece of meat cooked to 55°C will retain about 85% of its raw weight. At 65°C, it drops to 75–80%. At 75°C, you're looking at 70% or less. That's a significant amount of product loss.
The Shrinkage Trade‑Off: In a sous‑vide bag, the confined environment helps retain moisture even as the fibers contract. The liquid that's squeezed out stays in the bag, re‑absorbing into the meat as it cools. This is a major advantage of sous‑vide over traditional cooking methods.
Why Sous‑Vide Works for Tougher Cuts
Here's where everything comes together. Sous‑vide is perfect for tough, collagen‑rich cuts because it addresses the two conflicting needs:
High enough temperature to break down collagen (above 55°C).
Low enough temperature to prevent excessive moisture loss (below 65°C).
In a conventional oven, these two goals are in direct conflict. To break down collagen in a tough cut, you need prolonged exposure to temperatures above 70°C. This inevitably dries out the meat. In sous‑vide, you can hold the meat at 55°C for 24–48 hours, giving the collagen time to break down without ever pushing the meat into the danger zone for moisture loss.
The result is a piece of meat that would be tough and dry if braised, but in sous‑vide, it's tender and juicy—often more tender than a prime cut cooked to the same temperature.
The Role of Fat
Fat isn't just flavor—it's a temperature buffer. When you cook meat, the fat melts and coats the muscle fibers, helping to insulate them from further moisture loss.
Marbling: Intramuscular fat (the white streaks in a ribeye) melts between 30°C and 40°C. As it melts, it bathes the muscle fibers in liquid fat, which improves perceived juiciness even if the meat is cooked to a higher temperature.
External Fat: The fat cap on a pork shoulder or a ribeye roast serves a different purpose. It insulates the meat as it cooks, slowing the heat transfer and giving the interior more time to reach temperature without drying out.
The Temperature Range: Different fats melt at different temperatures, which is why pork fat is softer than beef fat at room temperature. The melting point of fat affects both the texture and the flavor of cooked meat.
The Chef's Takeaway: When you're cooking a tough cut, don't trim all the fat. The fat content of these cuts is what makes them forgiving even at higher temperatures.
Meat Aging and Enzyme Activity
Enzymes are proteins that catalyze reactions. In meat, they continue to work after the animal is slaughtered—and that's a good thing.
Autolysis: This is the breakdown of proteins and fats by the meat's own enzymes. It starts as soon as the animal dies and continues for several weeks.
Tenderizing Enzymes: Proteases break down muscle proteins, making meat more tender. Lipases break down fats, producing fatty acids that contribute to flavor.
Temperature Sensitivity: These enzymes work most effectively at 40–50°C. This is why holding a piece of meat at a warm temperature can accelerate tenderization. It's also why aging is done at relatively low temperatures—to slow the process down while still allowing it to happen.
Aging and Sous‑Vide: In sous‑vide cooking, the long cooking times at low temperatures effectively accelerate the aging process. The enzymes continue working at 55°C, breaking down proteins and fats, while the heat also coagulates the proteins. The result is meat that's both tenderized by enzymes and set by heat.
The Danger Zone
Bacteria are living organisms, and like all living organisms, they have temperature preferences.
The Danger Zone (4–60°C): This is the temperature range where most pathogenic bacteria multiply most rapidly. In this range, bacteria can double every 15–20 minutes. Starting with a single bacterium, you can have millions within a few hours.
Psychrophiles (10–20°C): These bacteria grow slowly at refrigeration temperatures, which is why food eventually spoils even when kept cold.
Mesophiles (25–45°C): These are the most dangerous foodborne pathogens. They thrive at body temperature and are responsible for most cases of food poisoning. Staphylococcus aureus, Salmonella, and Escherichia coli are all mesophiles.
Thermophiles (55–65°C and above): These bacteria can survive high temperatures. Many form spores that are resistant to heat. This is why you can't sterilize food by boiling it—thermophiles will survive and can produce toxins.
Food Safety Guidelines: The FDA recommends cooking meat to the following internal temperatures to ensure safety:
Beef, Pork, Lamb: 63°C (145°F) with a 3‑minute rest
Poultry: 74°C (165°F)
Ground Meat: 71°C (160°F)
Fish: 63°C (145°F)
Important Note: These temperatures are for immediate safety. They assume you're cooking the meat to temperature and serving it immediately. In sous‑vide, you can cook at lower temperatures if you hold the product at that temperature for longer. Pasteurization is a function of both time and temperature, not just temperature alone.
The Physics of Heat Transfer
Heat moves from hot to cold in three ways: conduction, convection, and radiation. In sous‑vide, we're primarily dealing with conduction (direct contact between the product and the water) and convection (the movement of water around the product).
Conduction: Heat moves through solids from molecule to molecule. In a piece of meat, heat moves from the surface to the interior through conduction. The speed of conduction depends on the material—water conducts heat well; fat conducts it poorly.
Convection: Heat moves through fluids (liquids and gases) by the movement of the fluid itself. In a water bath, the circulator moves water past the product, carrying heat away and preventing hot spots.
The Difference: Water conducts heat about 23 times more efficiently than air. This means a sous‑vide product cooks faster and more evenly than one in an oven, even at the same temperature.
The Thickness Problem: Doubling the thickness of a product increases the cooking time by a factor of four. This is a geometric relationship, not a linear one. If a 25mm steak takes 1 hour to cook, a 50mm steak takes 4 hours—not 2.
The Chef's Takeaway: Uniform thickness is essential for even cooking. Trim your product to ensure it's the same thickness throughout, or use a weight to hold it flat.
Cooking meat is a complex interplay of temperature, time, and chemistry. Understanding the physics of heat on meat isn't just academic—it's practical. It helps you make better decisions about how to cook each cut, how to plan your prep, and how to achieve consistent results.
The best chefs in the world aren't just craftspeople; they're scientists. They understand the underlying principles and use them to their advantage. And now, with sous‑vide and other precision techniques, those principles are more accessible than ever before.
In the next article, we'll delve into the Maillard reaction—the chemistry of browning and flavor—and how to get it right when finishing your sous‑vide product.
The Maillard Reaction and Finishing Your Sous‑Vide Meat
The science of browning and the art of the perfect crust—how to elevate your sous‑vide cooking to restaurant quality.
Why Your Sous‑Vide Meat Looks Pale
Here's the thing about sous‑vide: it produces perfectly cooked, incredibly tender, intensely flavorful food—and it looks terrible straight out of the bag.
The pale, grayish surface that comes out of a sous‑vide bag is the result of the low-temperature environment. The proteins have coagulated, the moisture has been retained, but the chemical reactions that create color and complex flavor haven't happened. Those reactions require temperatures well above what sous‑vide can provide.
This is where finishing comes in. The crust you add after the bath isn't just for show—it's an essential part of the flavor profile.
The Maillard Reaction: Chemistry of Flavor
The Maillard reaction is the chemical process that creates the brown color and savory flavor of seared meat, toasted bread, roasted coffee, and caramelized onions. It's one of the most important reactions in cooking.
The Chemistry: The Maillard reaction occurs between amino acids (the building blocks of proteins) and reducing sugars (simple sugars like glucose and fructose). When heated together, they undergo a complex series of reactions that produce hundreds of different flavor compounds. Some of these compounds are volatile (they produce aromas), while others are responsible for color and taste.
The Temperature Range: The Maillard reaction is relatively slow at temperatures below 100°C. It speeds up dramatically at 150–250°C. This is why you can't brown food by boiling it—the temperature is too low. You need dry heat or fat to reach the higher temperatures.
The pH Factor: The Maillard reaction is faster in alkaline environments. This is why adding a pinch of baking soda to your meat before searing can enhance browning. The baking soda raises the surface pH, accelerating the reaction. Use it sparingly—a light dusting is enough.
The Sugar Factor: Adding a little sugar—especially glucose or fructose—can also enhance browning. This is why some chefs brush meat with a light glucose syrup before searing. The sugar provides more fuel for the reaction.
The Moisture Factor: The Maillard reaction slows down in the presence of water. This is why it's essential to pat your product dry before searing. Moisture on the surface creates steam, which cools the surface and prevents browning.
Caramelization vs. Maillard
These two reactions are often confused, but they're different processes.
Caramelization: This is the breakdown of sugars at high temperatures. It happens when sugar molecules are heated to the point where they break apart and recombine into new compounds. The result is a sweet, slightly bitter flavor and a brown color. Caramelization occurs at temperatures above 170°C for sucrose (table sugar), but at lower temperatures for other sugars.
Maillard Reaction: This is the reaction between amino acids and sugars. It produces a different set of compounds—more savory, more complex. It occurs at lower temperatures than caramelization and produces flavors that we associate with cooked meat.
The Difference in Practice: When you sear a steak, you're getting a combination of both reactions. The sugars in the meat caramelize, while the proteins undergo the Maillard reaction. The result is the complex, savory crust we love.
The Ideal Crust: What Are We Aiming For?
The perfect crust on a sous‑vide steak has several characteristics:
Color: It should be deeply browned—a rich mahogany color that signals flavor development. This isn't about aesthetics; it's about the hundreds of flavor compounds that have been created.
Texture: The crust should be crisp and slightly crunchy. This is the contrast that makes a great steak enjoyable. The soft, tender interior against the crisp exterior creates a satisfying eating experience.
Flavor: The crust should be intensely savory—umami, slightly nutty, with hints of bitterness that balance the richness of the meat.
Thickness: The crust should be thin—just a millimeter or two. If you sear too long, you'll cook the interior and undo all the benefits of sous‑vide.
How to Achieve the Perfect Crust
Now that we understand the science, let's talk about the practical techniques.
1. Pat It Dry
This is non‑negotiable. Water is the enemy of browning. When you put a wet piece of meat into a hot pan, the water immediately turns to steam, which cools the surface of the meat and prevents the Maillard reaction.
Use a paper towel to pat the surface of your product thoroughly dry. For large pieces, you may need to do this multiple times. If the meat is still moist, you'll get steaming instead of searing.
The Chef's Takeaway: Dry the surface, then dry it again. Then let it air‑dry for a few minutes. The drier the surface, the better the crust.
2. Choose Your Fat Wisely
The fat you use for searing should have a high smoke point—the temperature at which it starts to break down and produce off‑flavors.
Neutral Oils: Canola, grapeseed, vegetable oil—these are the workhorses. They have high smoke points and won't add unwanted flavors.
Clarified Butter (Ghee): This has a high smoke point and adds richness. It's a classic choice for finishing steaks.
Olive Oil: Extra virgin olive oil has a lower smoke point and can be overpowering. Use it for finishing, not for searing. Refined olive oil (often labeled "pure" or "light") is better for high‑heat searing.
Animal Fats: Tallow and lard have high smoke points and add flavor. They're great for high‑temperature searing.
The Chef's Takeaway: The key is to use just enough fat to cover the bottom of the pan. Too much fat can lead to splattering; too little can cause sticking.
3. Heat Your Pan Properly
A hot pan is essential for browning. The pan should be heated until it's just starting to smoke. This indicates that the pan is at the right temperature for the Maillard reaction.
Stainless Steel: These pans heat evenly and hold heat well. They require a bit of oil to prevent sticking.
Cast Iron: The classic choice. Cast iron holds heat exceptionally well and creates a beautiful crust. It requires seasoning to prevent sticking.
Non‑Stick: These aren't ideal for high‑heat searing. The coating can break down at high temperatures, and they don't promote the same browning.
Grill: A hot grill will give you great flavor and beautiful grill marks. Preheat it thoroughly and oil the grates before adding your meat.
The Chef's Takeaway: A heavy, preheated pan is your best friend. The goal is to sear, not to cook.
4. Don't Crowd the Pan
When you add meat to a hot pan, it lowers the temperature of the pan. If you add too much meat at once, the pan temperature drops significantly, and you'll end up steaming rather than searing.
The rule of thumb: leave at least a finger's width between pieces of meat. If you need to cook a large batch, sear in batches and hold the finished product in a warm oven while you finish the rest.
The Chef's Takeaway: Crowding the pan is one of the most common mistakes home cooks make. Give your meat room to breathe.
5. Press It Down
A slightly warped piece of meat won't make full contact with the pan, resulting in uneven browning. Use a weight—a heavy pan, a bacon press, or even a spatula—to press the meat down and ensure full surface contact.
6. Time It Right
The sear should be brief—usually 30–90 seconds per side, depending on the thickness of the meat and the heat of the pan. The goal is to create a crust without cooking the interior.
Watch for the color change: the meat should go from pale to brown. Once you have a nice color, flip it and repeat on the other side. Don't move the meat around in the pan; let it sit and develop the crust.
7. Rest Before Serving
After the sear, let the meat rest for a few minutes before slicing. This allows the juices to redistribute throughout the meat. If you slice immediately, the juices will run out onto the plate, leaving the meat dry.
The Chef's Takeaway: A 5‑minute rest is usually sufficient for individual portions. Larger roasts may need 10–15 minutes.
Alternative Finishing Methods
A hot pan isn't the only way to finish your sous‑vide product.
The Grill
A hot grill adds a layer of smoky flavor that can't be replicated in a pan. The open flame creates small bursts of heat that produce excellent browning.
Technique: Preheat the grill to medium-high. Brush the grates clean and oil them lightly. Place the meat on the grill at a 45‑degree angle to the grates. After 1–2 minutes, rotate 90 degrees to create crosshatch grill marks. Sear the other side in the same way.
The Torch
A kitchen torch provides precision browning with minimal heat transfer to the interior. This is especially useful for delicate items or for finishing multiple pieces at once.
Technique: Keep the torch moving. A stationary flame will burn the surface. Move the torch in a circular motion, applying the heat evenly. It's easy to overdo it with a torch, so practice on a few test pieces first.
The Salamander
A salamander—a powerful overhead broiler—is a restaurant‑standard tool for finishing. It provides intense, even heat from above.
Technique: Place your product on a rack and position it under the broiler. Leave the door slightly open to allow moisture to escape, which aids browning. The intense heat will create a quick crust without affecting the interior.
The Deep Fryer
This is a lesser‑known trick, but it works brilliantly for some proteins. A quick dip in hot oil (170–180°C) creates an even, crisp crust in seconds.
Technique: Pat the product very dry. Lower it into the hot oil and fry for 30–60 seconds, just long enough to create a golden crust. Drain on paper towels before serving.
Enhancing the Maillard Reaction
If you want to take your crust to the next level, consider these techniques:
Sugar Boost
A light dusting of glucose powder or a brush of glucose syrup before searing will significantly enhance browning. The glucose provides additional reducing sugars for the Maillard reaction.
Ratio: Use glucose powder sparingly—a light dusting is all you need. Glucose syrup should be applied in a thin layer, almost like a glaze.
Baking Soda
A pinch of baking soda raises the surface pH of the meat, which accelerates the Maillard reaction. This is a trick used by many high‑end kitchens to achieve deep browning with less time in the pan.
Ratio: Add one part baking soda to three parts salt. Sprinkle the mixture on the surface of the meat and let it sit for 15–30 minutes before patting dry and searing.
Note: Don't overdo it. Too much baking soda can create an unpleasant alkaline taste.
Butter Basting
For the ultimate crust, try butter basting. After you've seared the meat on both sides, add a knob of butter and some aromatics (garlic, thyme, rosemary) to the pan. Tilt the pan toward you and use a spoon to baste the meat with the foaming butter.
The butter adds richness and helps create an even crust. The aromatics infuse the butter, which then flavors the crust. This is the classic steakhouse technique.
Common Mistakes and How to Avoid Them
Searing Straight from the Bag: The meat is wet and likely cold. Pat it dry and let it come to room temperature (briefly) before searing.
Moving the Meat Around: Once you put the meat in the pan, let it sit. Moving it prevents the crust from forming.
Not Enough Oil: The oil isn't just for lubrication—it's for heat transfer. Not enough oil means hot spots and uneven browning.
Too Much Oil: Too much oil can lead to splattering and a greasy crust.
Over‑Searing: The crust should be thin. If you sear for too long, you'll cook the interior.
Not Resting: This is the easiest step to skip, and one of the most important. Resting allows the juices to redistribute, keeping the meat moist.
The Bottom Line
The crust is an essential part of any sous‑vide steak. It provides color, flavor, and texture that are impossible to achieve through the low‑temperature cooking process alone.
Understanding the Maillard reaction and how to use it to your advantage will transform your sous‑vide cooking. With a hot pan, a dry surface, and a few seconds of attention, you can turn a perfectly cooked piece of meat into a restaurant‑quality dish.
In the next article, we'll explore the world of vegetables in sous‑vide—from precise poaching to caramelized perfection.


Comments